
Quickstart: from data to answers
This walkthrough takes you from an empty workspace to asking questions about your own documents. The Create wizard does most of the work — it sets up the group, the data source, and the ingestion in one guided flow, and provisions the collection and pipeline for you behind the scenes.
Before you start, have ready:
- Either a Google account whose Drive holds the documents, or the connection details of an SMB network file share (server name, IP address or hostname, port, username, and password — your IT team can provide these).
- About 10 minutes.
-
Open the Create wizard.
In the dashboard sidebar, under Get started, select Create. The wizard has three steps, shown as a progress rail on the left; you can go back and edit a completed step at any time.
-
Choose a group.
The first step decides who has access to this data once it’s ingested. Pick an existing group, or switch to Create new group and name one (letters, numbers, hyphens, and underscores). Select Create & Continue.
→ Details in groups & permissions.
-
Connect your data.
Pick a connector on the left — Google Drive or SMB Share (Confluence, Jira, and Notion are marked coming soon):
- Google Drive: name the source, then select Connect Google Drive — Google opens in a small window to grant access, and the wizard stays where it is. Once connected, choose Ingest everything or Choose specific files and pick files in the Drive browser.
- SMB Share: name the source and fill in the connection details (username, password, remote system name, IP address, port — 445 by default). Insight AI verifies the credentials immediately; if they’re wrong, nothing is created.
Select Connect & Continue. The wizard provisions a collection and a pipeline for the source automatically — that’s the searchable index your documents will land in, and the machinery that fills it.
→ Details in connecting a data source.
-
Review & Ingest.
The last step summarizes the group, connector, and data source, with Collection & pipeline: Auto-provisioned ✓. Select Start Ingestion and watch the progress bar. Supported documents (PDF, Word, PowerPoint, text, Markdown, CSV) are extracted, split up, and indexed for semantic search.
When it finishes you’ll see Ingestion complete, how many files were processed, and two buttons: Open Chat and Create another.
→ Details in running & monitoring ingestion.
-
Add a model.
If your organization hasn’t pulled a model yet, go to Models → Create Model and enter a model ID from the Ollama library (for example
llama3.2). Watch the download progress; when it finishes, the model is benchmarked and available to everyone.→ Details in managing models.
-
Chat with your data.
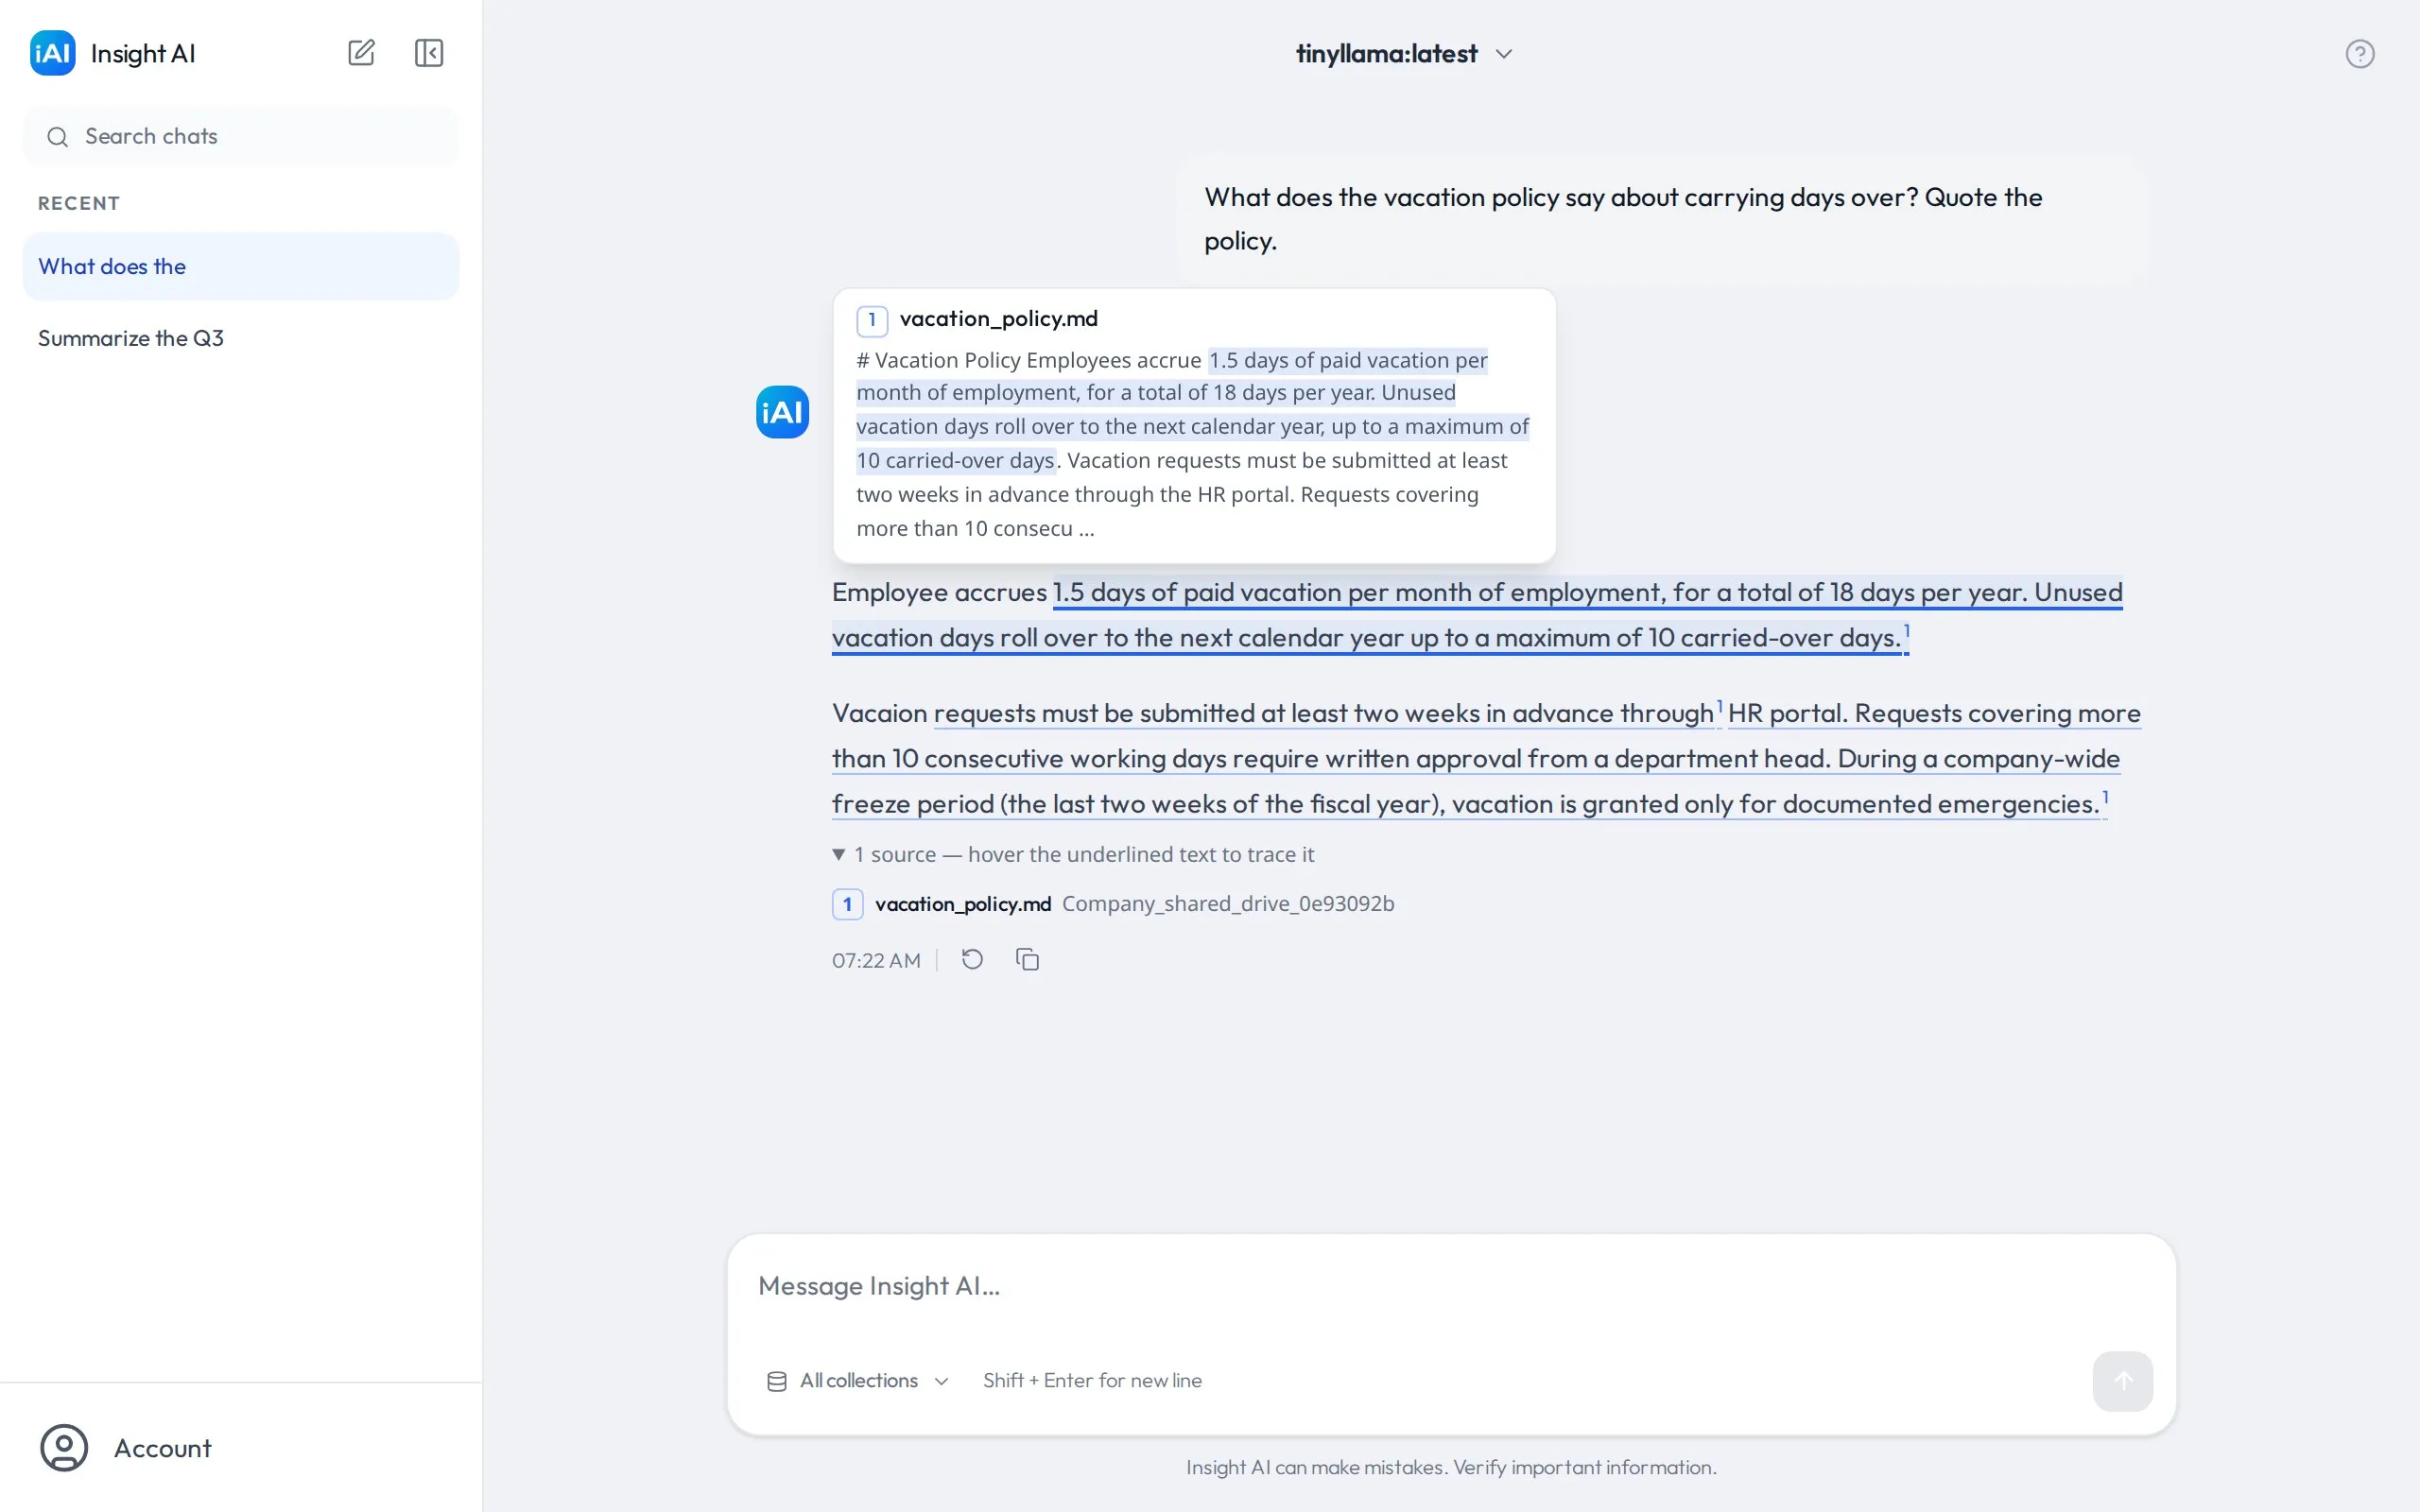
Select Open Chat from the wizard (or All chats → in the sidebar). Use the model selector at the top to pick a model — if the list is empty, choose Add a model and add one of your organization’s models to your personal list. Then ask a question about your documents.
The answer streams in as it’s generated, with the passages that came from your documents underlined and numbered — hover one to see exactly where it came from.
→ Details in chatting with Insight AI.
Where to go next
Section titled “Where to go next”- Understand how answers use your documents
- Learn what happens when you re-run a pipeline
- Organize your team with groups
- Check the FAQ & troubleshooting