
Groups & permissions
Groups are how Insight AI models your team. They serve three purposes:
- Ownership & access — every data source belongs to a group, that group’s key encrypts the source’s stored credentials, and the source’s collection is searchable only by the group’s members. Who’s in the group decides who can ask questions about the data.
- Structure — groups nest into a parent/child hierarchy that can
mirror your org chart (e.g.
Company → Finance → Accounts_Payable). - Permission levels — each group carries a level describing its intended access: Viewer (view content), Editor (view and contribute), or None.
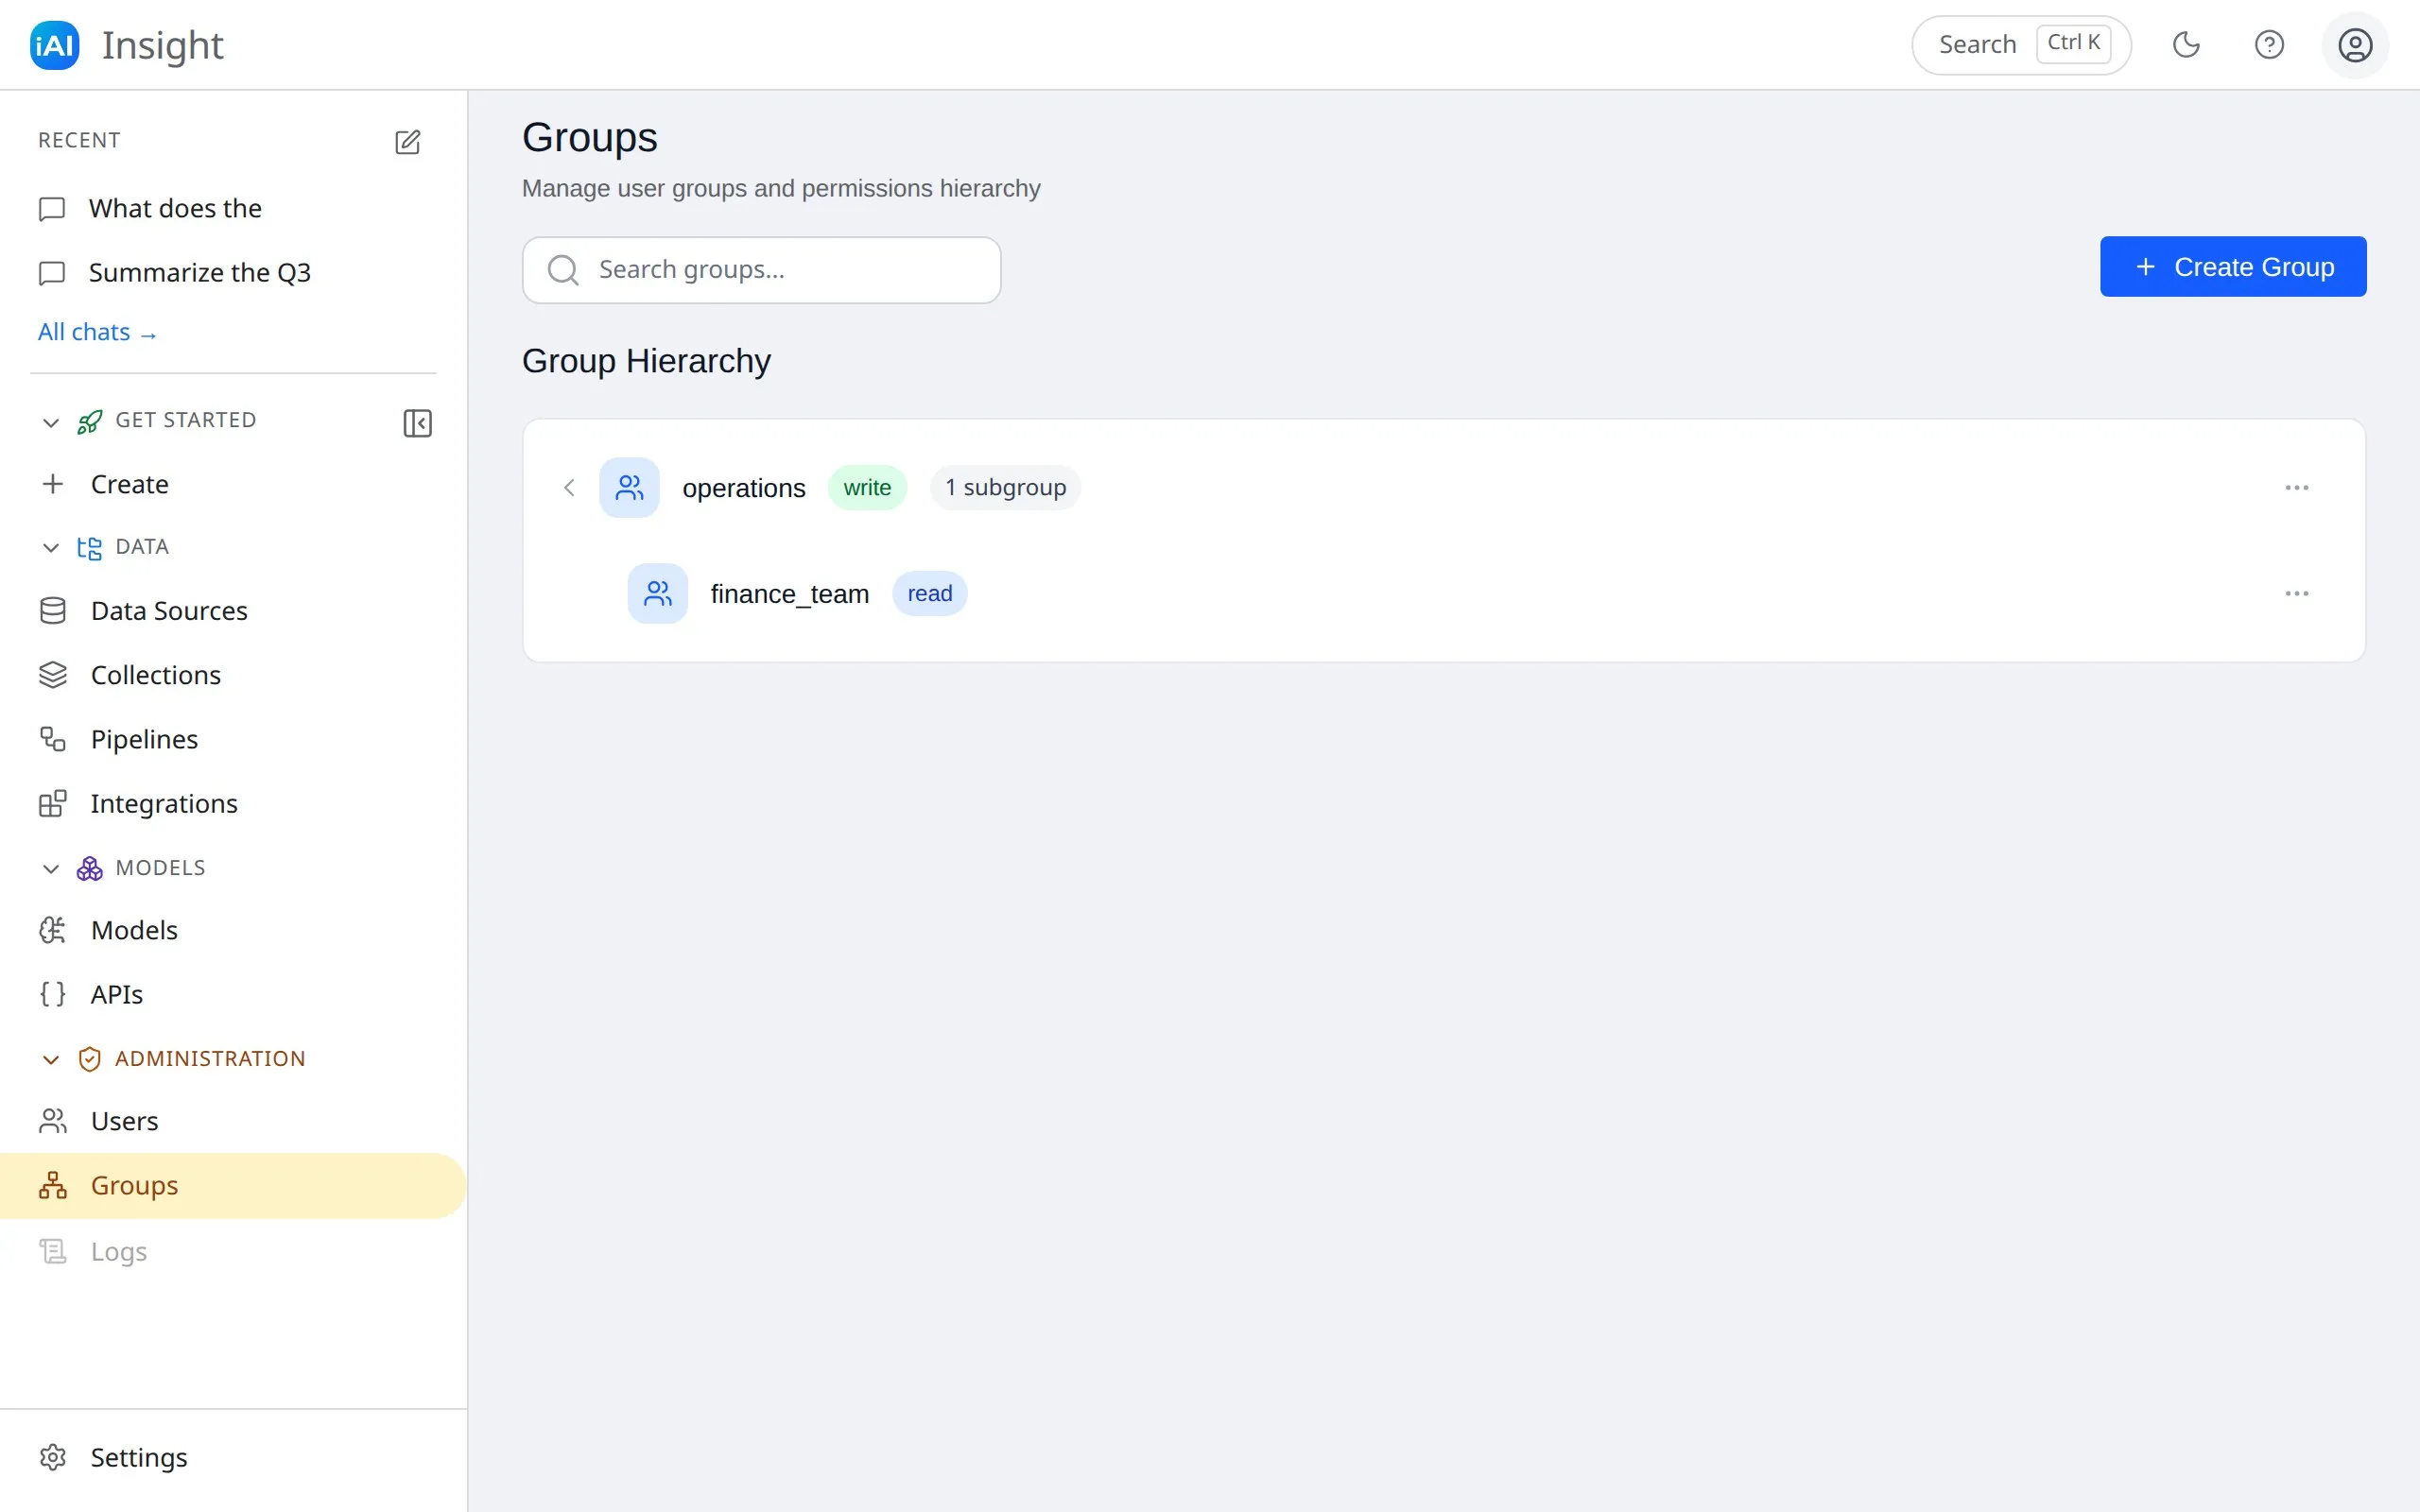
Find groups on the Groups page, under Administration in the dashboard sidebar. (The Users page next to it lists everyone with an account, along with their group and permission.)
Create a group
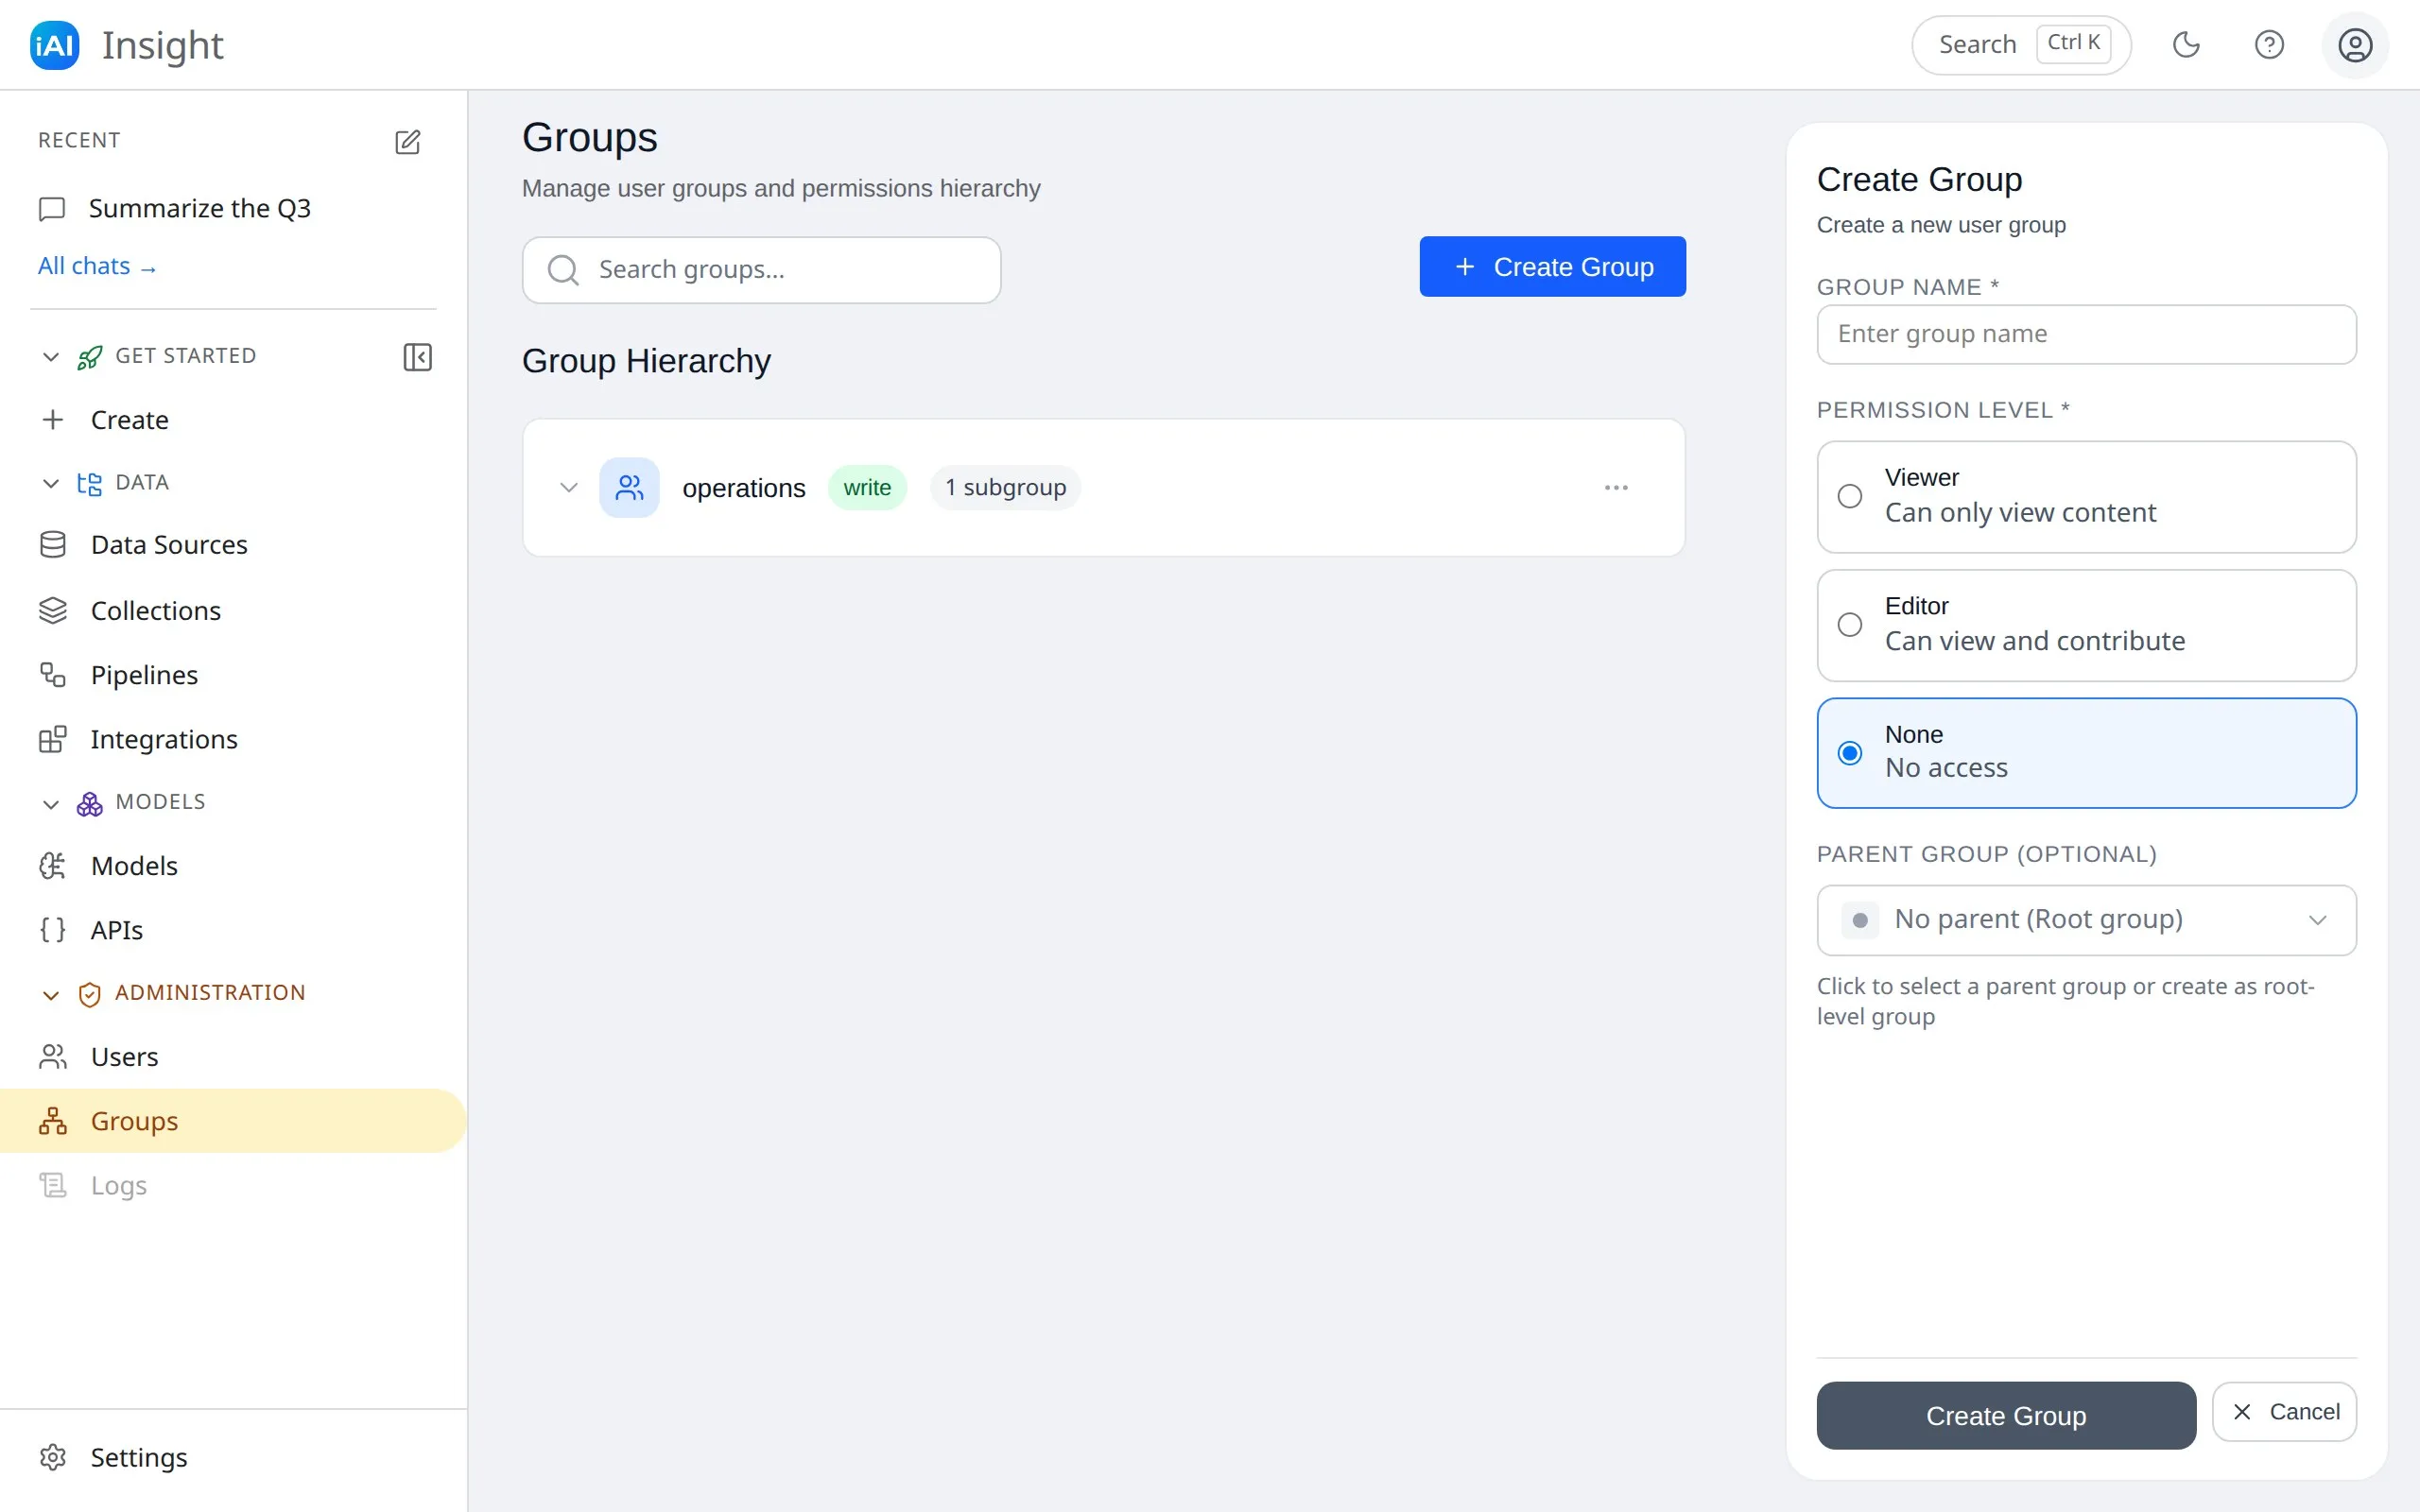
Section titled “Create a group”- Select Create Group.
- Enter a Group Name — 3–50 characters, letters, numbers, underscores,
and hyphens (no spaces), e.g.
data_team. - Choose a Permission Level (Viewer, Editor, or None).
- Optionally pick a Parent Group — leave it empty to create a root-level group.
- Select Create Group.
The Create wizard can also create a group as its first step when you’re setting up a data source.
To add a subgroup directly under an existing group, open that group’s action menu and choose Add Subgroup — the parent is pre-selected.
Edit a group
Section titled “Edit a group”Open a group’s action menu and choose edit to change its name, permission level, or parent. Moves that would create a loop in the hierarchy (making a group its own ancestor) are rejected.
Manage members
Section titled “Manage members”Open a group and switch to the Members tab.
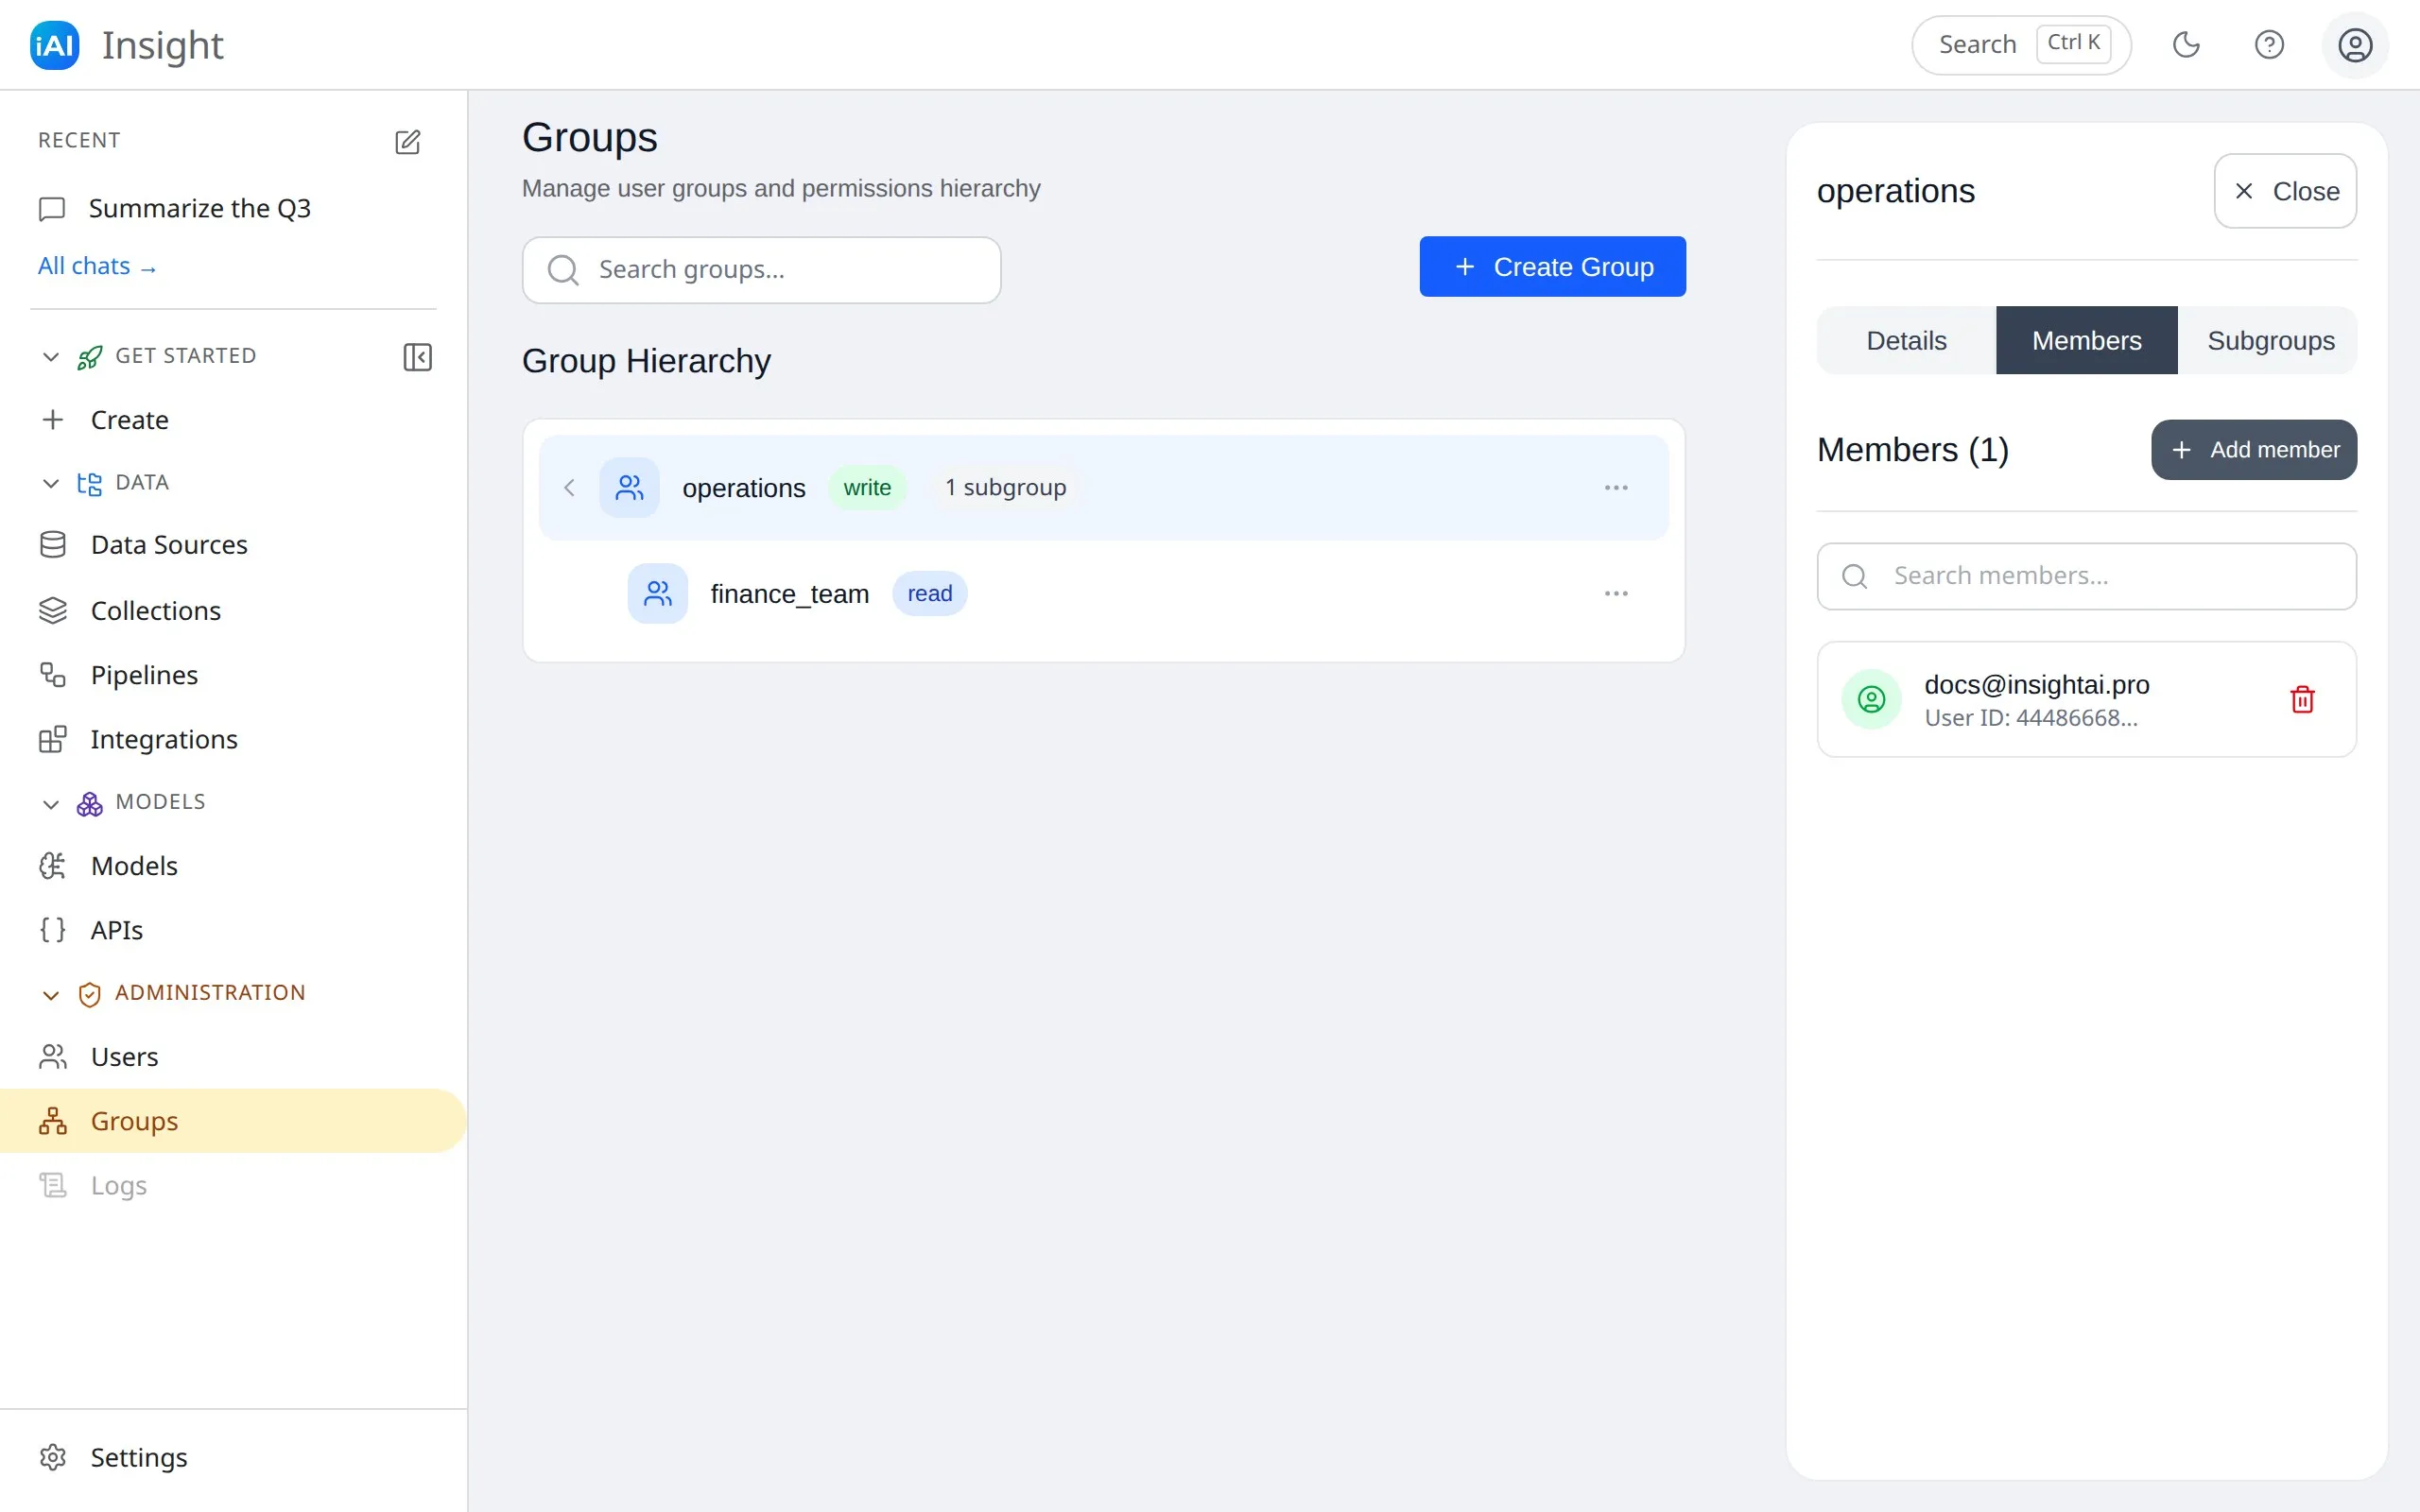
- Add one member: select Add member, enter the person’s email address (or user ID), and confirm. The person must already have an Insight AI account.
- Add several at once: switch the dialog to Add Batch, paste emails separated by commas or spaces, select Add to Stack to turn them into a reviewable list, then Process & Add Members.
- Remove a member: select the trash icon next to them and confirm.
The hierarchy
Section titled “The hierarchy”The Subgroups tab of any group lists its children, and the Groups page lets you drill down through the structure — a breadcrumb trail shows where you are. Deleting a group does not delete its subgroups — they become root-level groups instead.
Practical tips
Section titled “Practical tips”- Create at least one group before connecting data sources — every source needs an Owner Group (the wizard handles this as its first step).
- Membership is access: someone not in the owner group can’t search that source’s content in chat. Compose groups around who should be able to ask.
- Keep group names short and descriptive; they appear in dropdowns when creating data sources.
- A group that still owns data sources can’t be deleted — the dashboard tells you which sources are in the way. Delete or migrate them first.